Well it appears that there is a bunch more "patch work" needed.
The holes that have been drilled through the skin are many.
I need to focus on getting the shell sealed up.
There is no way to do any of the interior work until I can keep the water out.
I can't invest time in the new floor or replacing the inner walls because I don't want them to get wet.
More of the day was spent on the roof.
It figures we have a wonderful mild summer until today.
Mid 90's and some of that wonderful Maryland humidity.

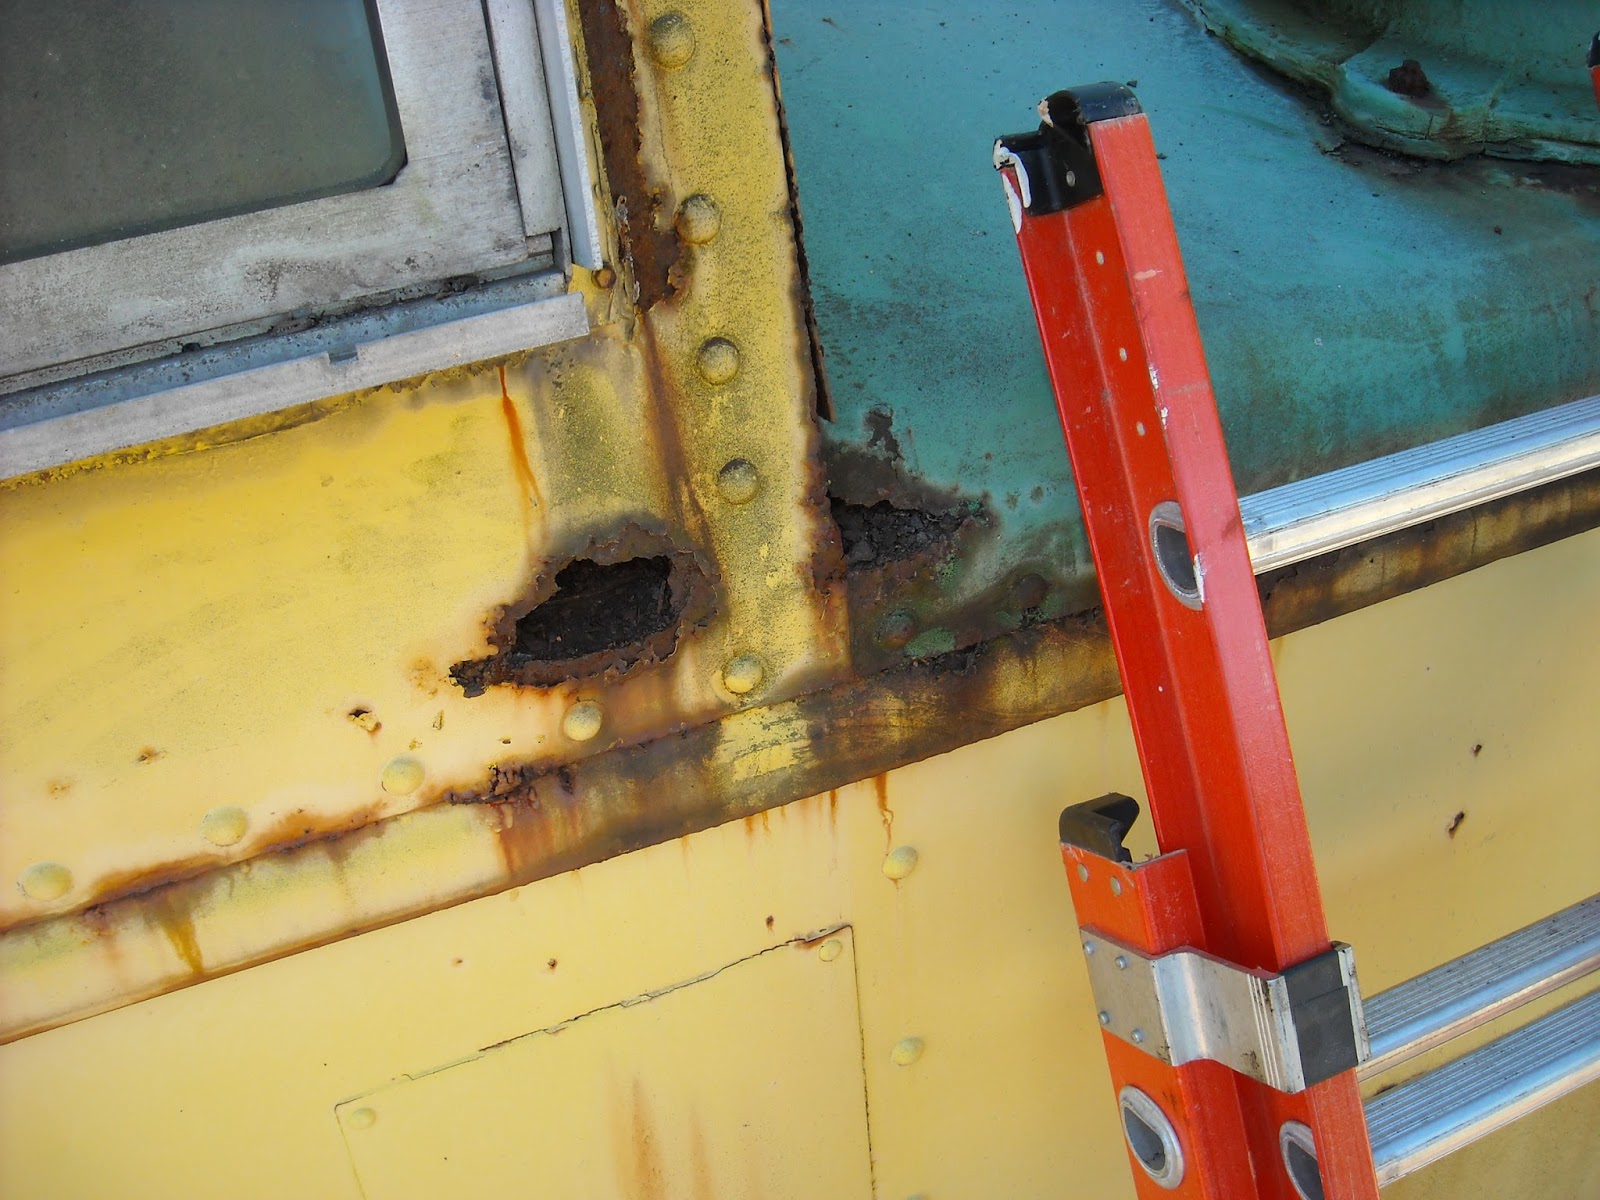
Many of the seals look like this.
It will require replacement, not a patch

These kinds of holes are the reason the floor is rotten and the interior walls are rotten too.


The decision was made to remove the entire panel, where the window is installed, on both sides.
We are going to have a new piece of steel cut and punched and the window reinstalled in the new section.


These are what is left of the handles that were on the corners of the roof.
back in the day, they were installed to help the operators climb onto the roof.
I will be replacing these handles.


This is the inside of the panels where the windows are mounted. They are a mess.

there were plenty of holes on the roof that had been drilled through , for one reason or another.

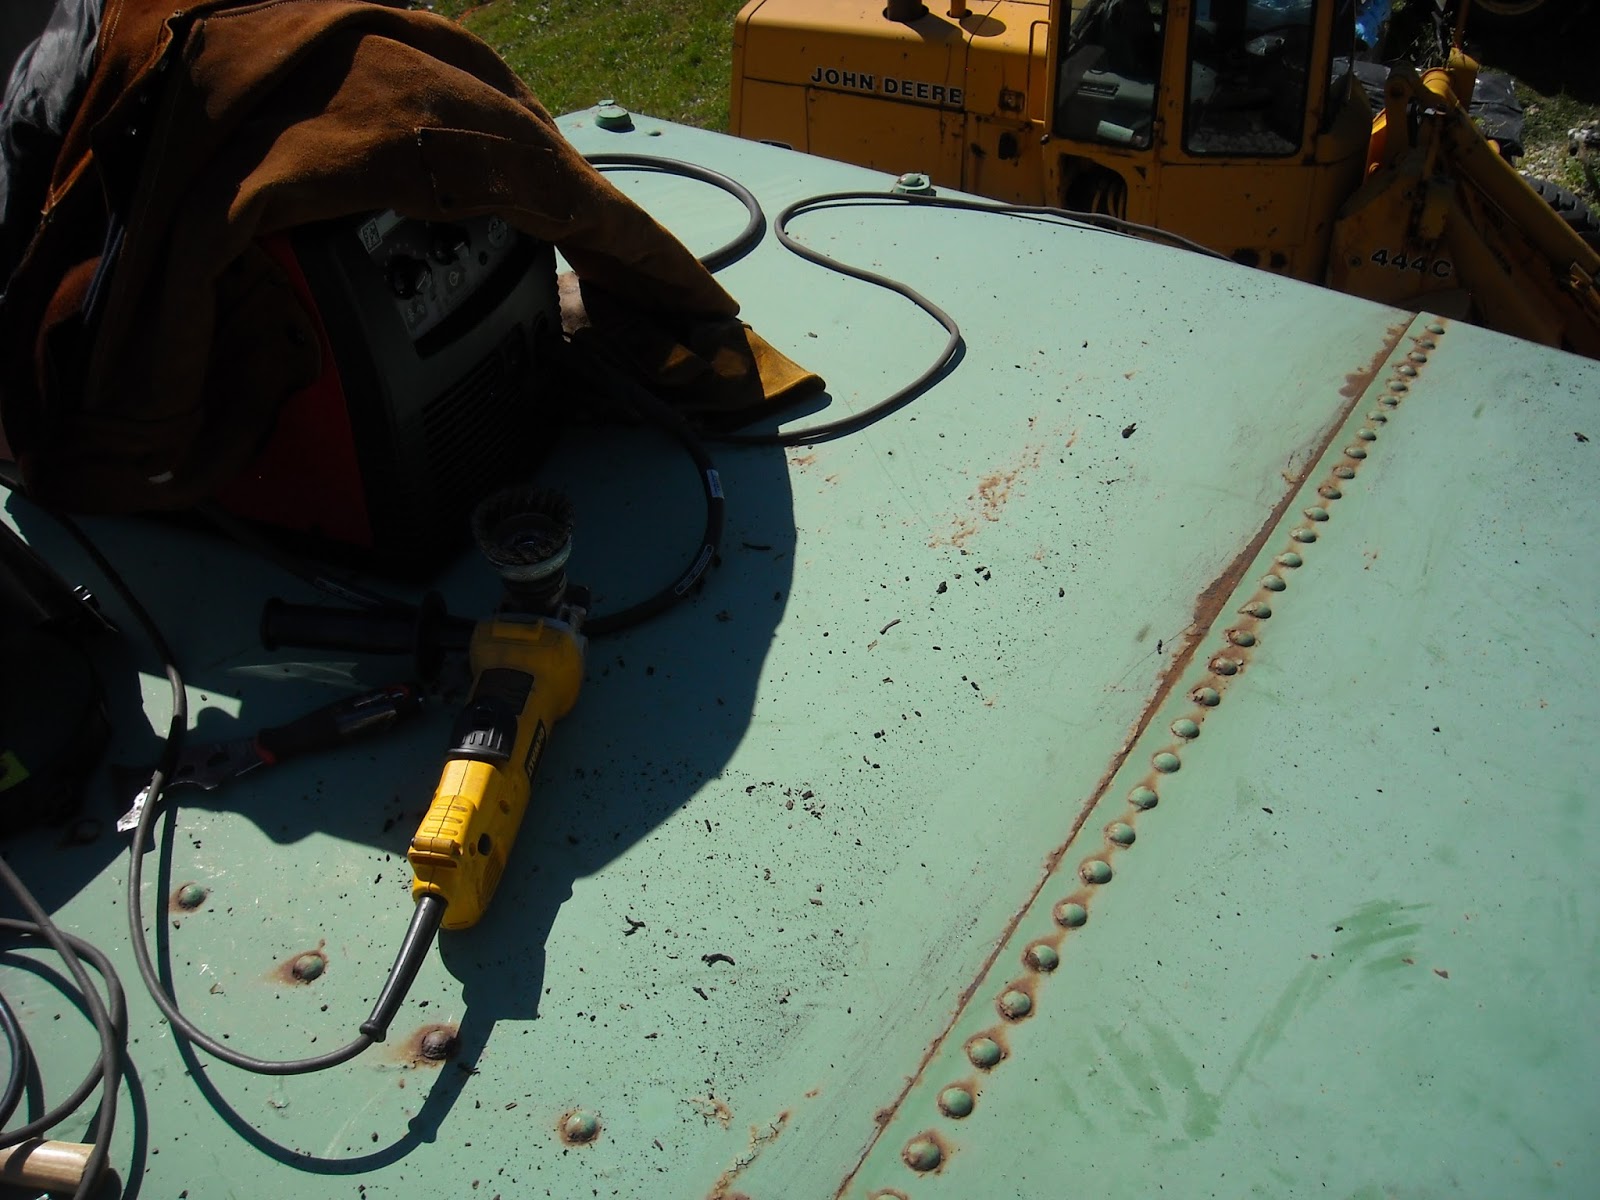
taking a wire wheel to the seam and the rivets showed me that they were better than I thought!


I ground down the area on these handle bases. I do not want to remove the rivets. They are original and I would like to preserve them.
I intend to weld the new handles to the bases so I needed a nice flat surface.


These were the holes for the bolts that held the interior water tank in place

each were filled and sealed


I primed each area that had been cleaned or welded. There will be a more complete priming once all the patch work is complete. This is just to keep it for getting worse...for now.

Two more roof areas than I go back to the sides

This is the second of the side patches. Two more on this side than I move around.


