Monday, March 23, 2015

Second Day of Spring , Snow and another section of roof to fix

It was a quiet snowy morning, serene and beautiful. The kind of morning from a Norman Rockwell painting… Until I realized how much snow I would have to remove to get to work!
There was about 4 inches on the surface of the caboose and on the top of the container that I use as a safe standing area.  Did I say safe??
Anyway, he first block of time was spent clearing snow and ice from the work area.
I needed the areas to be relatively dry before I can break out the welding machine. Somehow the thought of setting the welder on top of ice and snow did not feel right, but neither did sitting it in the puddles that the 50 degree temps would create later today…
Anyway… upward and onward!
It really was pretty on the way to the yard. I like the drive, just wish there was less of it.
I started the heater inside the car first. That helped with the ice on the roof.

Once clear I hoped it would dry fast.


The cut away was first, as always, I am amazed by the rust I find. 


Clean, grind and primed


I was a bit disappointed in the work today.
The roof , when cut away, " popped" and there were waves in the old roof line that gave me a fit.
I was able to support from inside but the welds did not look as good as the others.


But... it is done and watertight.


I was also able to get the other handrails done today.
Next... the last section of roof.


Thursday, March 19, 2015

Another Roof Edge

I know... I have four of these... Actually, there are 6 ( if you count the top of the copula.)
Each of these corners are very similar but this one is special.
I had to cut out the area for the smoke stack.
So I started the same as all the others; I had to bend some steel. The templet and the dies, that we made so many months ago, are working fine!


After we have the parts ready, its time to get to work.
I took the newly bent steel and dry fit to the roof.
All the rivets have already been cut out and the old rusty steel is next.


This shot shows the fun relating to this piece of roof.
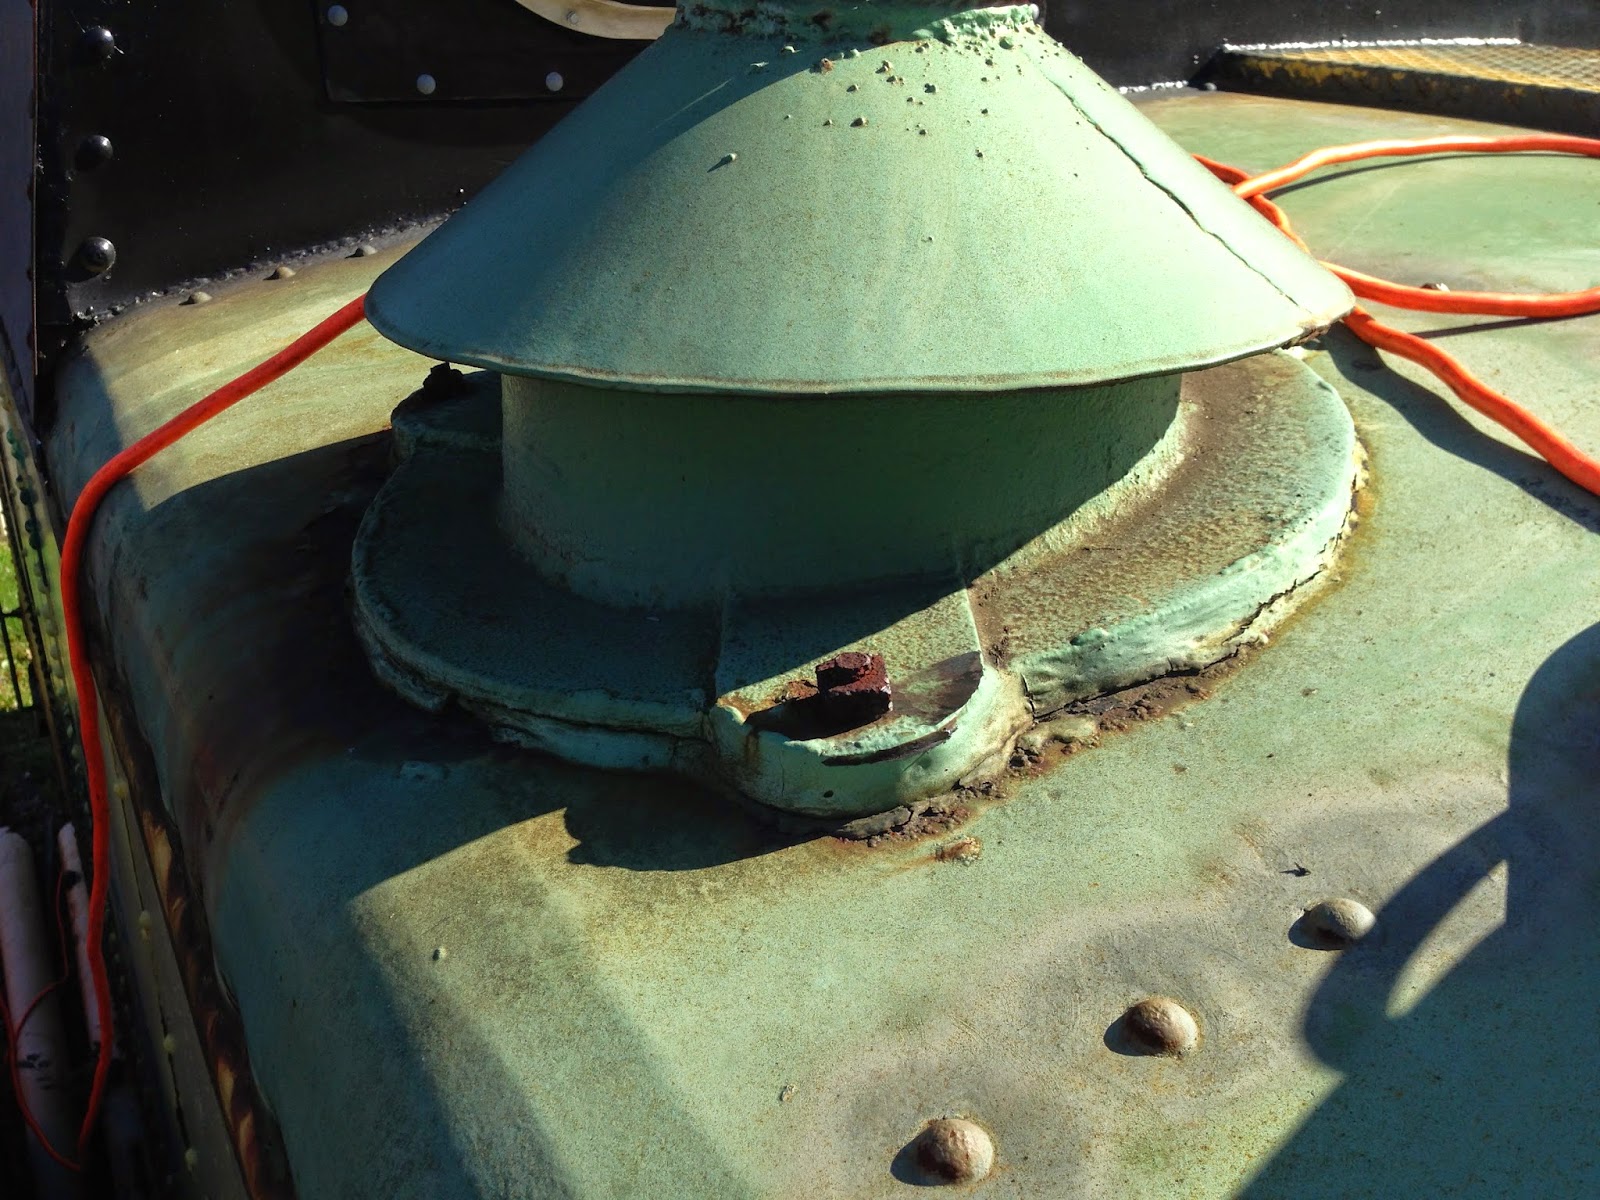
I have to cut out the base of the smoke stack.

This was a mess. Lots of rust.


I cleaned all the rust and primed that area


I also placed the welding blanket inside because of setting things on fire before. I also have learned to wet the interior of the car to help minimize the chance of a fire issue.


This is the new section welded in.


next to do the front section of this side and on to the drilling and bolt up.


Monday, December 22, 2014

New Rails

The day yesterday was spent attaching the rails that were bent last week.
The curve and height looked great.
Because I did not want to re-bolt the rails to the ladder, I ground down the heads of the rivets and welded them in place. The rails where heated and hammered flat to give a better appearance and to give a larger flat surface to weld to.
THEY HELD GREAT!
The attachment to the roof studs was the same as it was on the top of the copula.


The top rung of the ladder was also removed to help keep unwanted visitors from the top of the car


I fit 3/4 round stock through the existing holes ( after I opened them back up)
and welded the new rung in place.


They are nice and sturdy.
Next week, the other set.

Monday, December 15, 2014

Roof Handles

A few weeks ago I made the roof handles but did not get to the handle that got you on the roof. 
That day is today.
I started with the same 3/4" stock bar and made a template on cardboard.
I got the distance and spacing now I just need to bend it.

You can see at the top of the exterior ladder , where the handles had been cut off.


The handles will attache at the top of the ladder and then to the roof.


I used my home made anvil to flatten the surface of the side that will attach to the ladder.
I ran out of time today.
I will be attaching them next week.


Monday, October 27, 2014

The Chimney

The chimney weighed a TON!


Water was leaking through the joint.

I cut the bolts and hammered them though

When the portion if the chimney on the interior broke loose... It made a a crazy loud bang as it hit the floor inside.
That part must weigh 100 lbs.!!


The hole needs to be cleaned up and primed


The top had to be cleaned up. I cut the top off and removed the section that was rusted so I can re-weld the top back to good metal.


More on this next week.

Well, all the parts have been cleaned and primed.
Did I mention they weighed a TON!?


Now the fun begins...putting it back up.
The top should be no problem.
Did I mention the weight?
These parts are all Cast Iron.
I believe the base it approx. 80-90 lbs and the top is very close to the same.
Not the best task being solo.

BUT...
Its done.
The interior was a pain.
I had to lift it in place and find a way to put a washer and bot on the carriage bolt.
Fun times.
Did I mention the weight?

I loaded up the surface with a good sealer.
I am hoping it is all it claims to be


The top was sealed with a tar based sealant from 3m.
The windows were done with the same product.
It worked great on those.
I am going to let it dry then cut the extra away and dress it up.